How to Install Herringbone Flooring?
Herringbone floors are an excellent way to add style and character to your home. They are available in a wide range of materials and widths.
However, installing a herringbone floor can be tricky. This is because herringbone parquet requires a lot of attention to detail. This article will discuss the steps involved in herringbone flooring installation.
Preparing the Subfloor
If you want herringbone parquet to look good, you have to prepare the subfloor before laying it. It must be smooth, dry, and free from structural defects. If your apartment originally had floorboards, replace them with plywood compatible with herringbone parquet flooring or lay a sound-absorbing barrier underlay before proceeding.
Herringbone parquet boards are manufactured with a tongue on one side and a groove on the other, making them easy to fit together. Before laying the first row, make sure all the edges of the slats match up and have a consistent length.
The direction you choose to lay the herringbone floors can affect how light travels around the room. It can also complement furniture arranged in a particular direction and create a sense of flow.
To begin with, cut the factory corner of a blank nailing plank into a right triangle with two forward edges matching the length of your slats. Then, fasten it to the floor using a flooring nailer.
Laying the Nailing Plank

If you’re looking for an elegant and traditional design, herringbone flooring is the way to go. It’s a great choice for rooms that need a touch of class, as it complements a variety of styles and colors. For example, you could pair a light tan brown herringbone floor with white walls and ceilings. It’s also a good idea to use a herringbone floor with other design elements, such as patterned rugs and eclectic decor.
The first step in herringbone installation is to lay the nail plank. This is the starting row that will set the direction for the entire field. It is important to keep the working lines straight during this process, especially at the corners. To accomplish this, a framing square can be used to measure the distance between the points at the control line. This measurement can then be divided by four to establish the working lines.
The nailing blank is a piece of 3/4-inch plywood that has been cut into right triangles with two long edges that match the length of herringbone slats. It is then screwed to the subfloor with wood screws, and a groove is routed along its two forward edges.
Adding the First Slat
Herringbone floors have a timeless appeal that can elevate your home’s interior design. They are also a great addition to any home renovation project, particularly those that involve hardwoods and prefinished engineered wood. These types of materials are considered the easiest to work with, making them a good choice for beginners. However, it would help if you were always careful to prepare the area before laying herringbone flooring. This will help you avoid unnecessary breaks in your workflow.
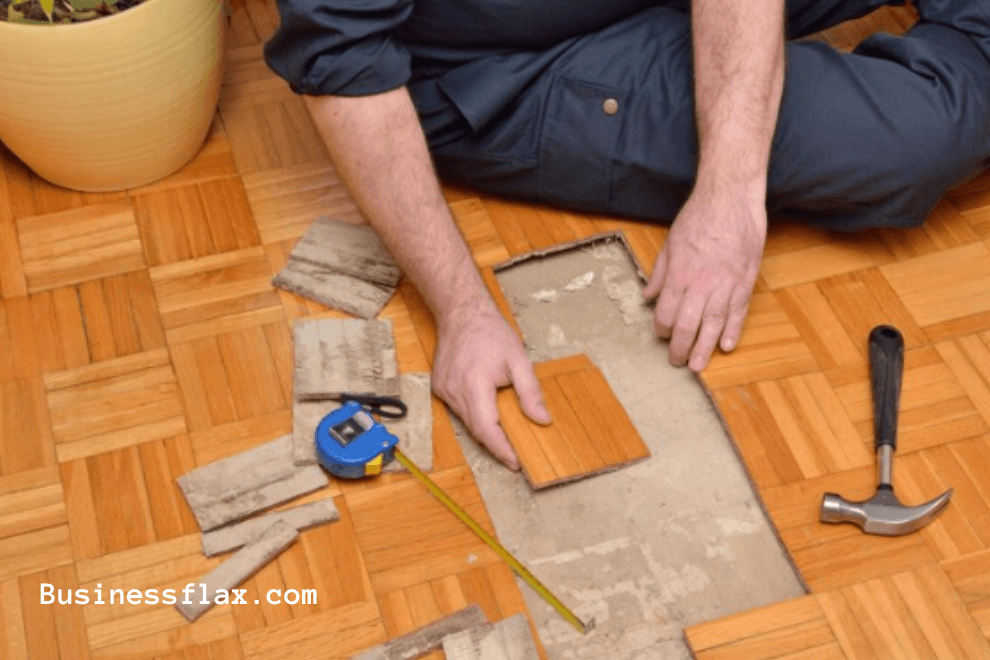
To begin with, you should make sure that the herringbone floorboards are acclimatized to the room’s temperature and humidity. It’s best to leave them in the room for 24 hours. This will help them adjust to the conditions in the room and ensure that they lock together well.
Once you have prepared the subfloor, it’s time to lay the first slat. Ensure that the first slat is aligned with the working lines and that its tongue is pointing outward. Next, nail the first slat to the subfloor. Repeat the process for the rest of the slats in the herringbone pattern.
Adding the Second Slat

As with any flooring installation, a little preparation is required before you start laying the herringbone pattern. This doesn’t take much time, and it can save you a lot of frustration later on. Herringbone floor patterns are unforgiving, and a little planning now can prevent your entire project from going off the rails.
To begin, fasten a backer board to the subfloor with a flooring nailer. Then, position the first slat over the nailing plank, aligning its ends and making sure they’re properly spaced. When you’re done, the slat should be snug and secure.
Once you’ve installed the first slat, create a groove along both of the nailing plank’s front edges. Then, install the second slat over the groove. Once again, make sure it’s in place and that the herringbone pattern is consistent. Continue this process until you reach the end of your herringbone chevron. Then, nail the remaining slats into place using your flooring nailer. After nailing, check the herringbone pattern once more and correct any mistakes. If you notice any gaps, fill them with wood glue and let it dry.
Finishing
When the herringbone installation is complete, it’s important to ensure that each slat lines up with the previous one. This will help to create the classic herringbone pattern and give the floor a balanced look. If you get this wrong, your whole floor will look a little odd and out of place.
After ensuring that the herringbone slats line up, it’s time to nail them. It’s recommended that you use a floor nailer rather than a power drill, as this will result in a much cleaner finish. It would help if you also were sure to apply tape on the areas where the slats overlap, as this will prevent any splintering.
Once the herringbone flooring is nailed down, it’s important to acclimatize the wood panels for 48 hours. This will help to reduce any moisture problems later on. You can do this by placing the herringbone in an area that’s warm and dry, such as a hallway. It’s also recommended that you lay a liquid-damp proof membrane (LDMP) on the subfloor before installing the herringbone. This will protect the herringbone from moisture damage and ensure that it has a long life.
Read also: How Do You Lay Artificial Grass on Concrete?